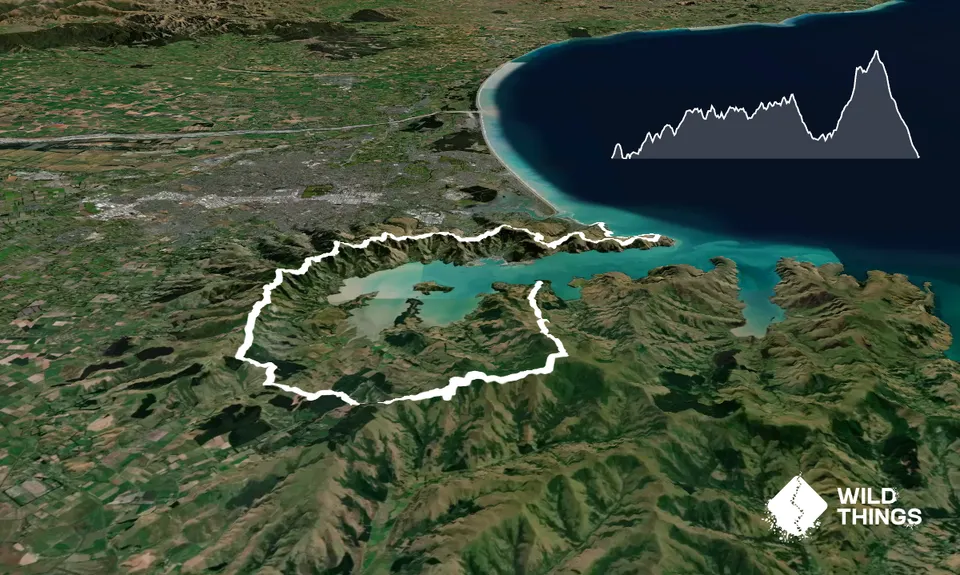
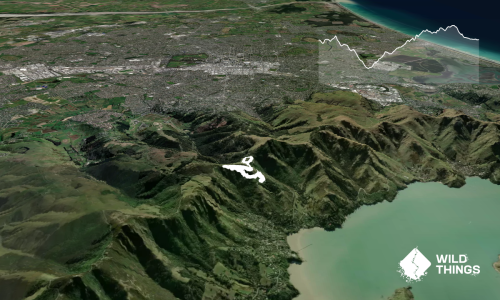
In my view the ATH is the definitive Port Hills Trail Run. I have run variations of this route over the years, always amazed at the beauty, challenge and diversity of this epic trail run that is on the doorstep of Christchurch residents and readily accessible by public transport. For many years I have thought this should be an organised ultra-run, kicking off with the iconic cliff-top Sumner/Taylors Mistake Walkway and culminating at the historic Godley House for well earned beers in the beautiful grounds. But alas the 2010/11 Earthquakes put paid to this potential race start route and end venue.
There is considerable choice along the early parts of this route in taking either the generally easy-running shared-used MTB single track, the more gnarly Crater Rim track or the tar-sealed Summit Rd. I am a trail runner, and look to avoid the black stuff as much as possible. I do however appreciate some sections of easier running shared-use MTB track over some pretty gnarly sections of the Crater Rim walking track, particularly over a run of this proportion.
Start at the Clock Tower at the end of Sumner Beach. A 500m jog along the water-front on Heberdeen Ave. At the Heberdeen/Scarborough Rd hair-pin bend, take the Flowers Tracks steeply up through Scarborough to the Searidge Lane. Turn right and jog along Taylors Mistake Rd for 700m, then taking a track on your left at the pine trees (joining what remains of the Taylors Mistake Walkway post-quake). Follow walkway to Taylors Mistake and then run either along the beach or on the high-tide track among the quirky huts.
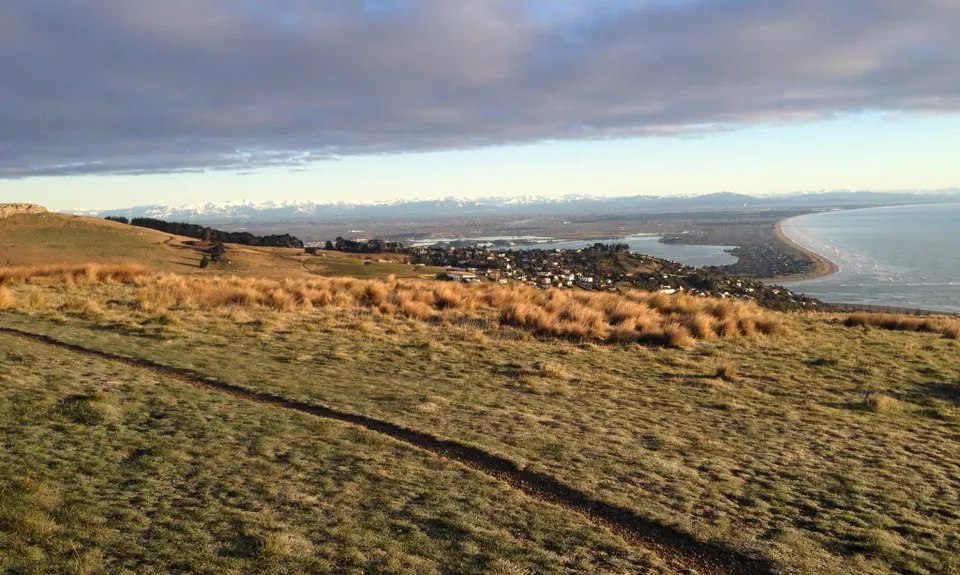
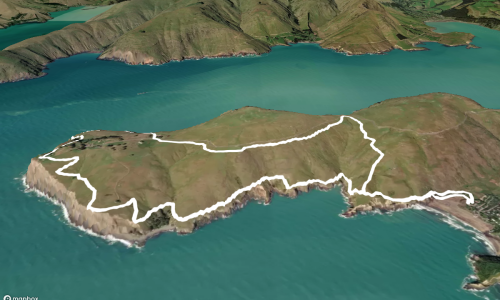
At the far end of Taylors Mistake Beach, join the Taylors Mistake Walkway and follow this beautiful and easy-running track around the cliff-tops before climbing up to the Godley Head Car Park Area (Toilets and water tap available, 7km completed). Head through the car park area, taking the stile over fence at the West end of the car park. Follow the Breeze Col MTB track up the hill and descend to Summit Rd at Breezes Col, catching your first views of Lyttelton Harbour and Mt Herbert opposite.
The track kisses Summit Rd at the bend - follow the well-formed shared-use MTB track on the left (Harbourside) of Summit Rd to Evans Pass. At Evans Pass, briefly join Summit Rd, cross Evans Pass Rd and take a track on the left in just 150m. Again, follow the MTB track (my preference over the Crater Rim track at this point) on the left side of Summit Rd, climbing steadily up to Greenwood Park. When the MTB track joins Summit Rd, turn left taking a trail through the John Britten Reserve on the right side of Summit Rd just after the Mt Pleasant Rd intersection.
Rejoin the Summit Rd briefly after 1km for a 400m down-hill section before locating the Gondola Track on the left side of the road bend, heading up and behind the Gondola (the Bluffs Track is very gnarly post-quake and not recommended for running). The Gondola Track merges with the Crater Rim track - keep left of Summit Rd and run through the Pioneer Womens Memorial. Follow the Crater Rim track uphill to the top of the climb above the bend in Summit Rd opposite Castle Rock. Keep on a relatively new section of walking track above the Summit Rd, under 'The Tors' before joining Summit Rd for a well-earned down-hill jog for about 1km.
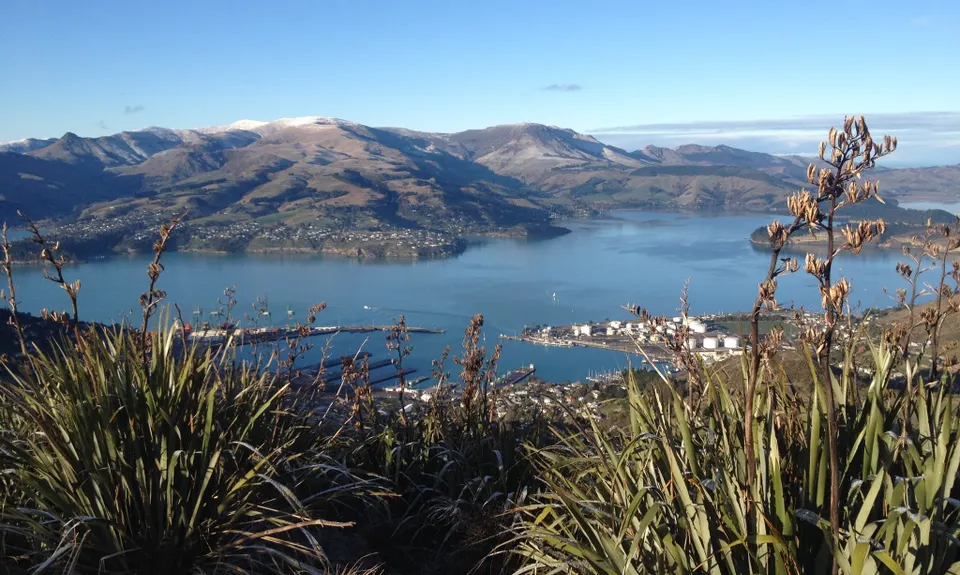
Find the track again on your left, traversing around Witch Hill before descending to the CP at the top of Rapaki Track. Keep left of Summit Rd, my preference being to take the shared-use MTB / walking track all the way to the Sign of the Kiwi. This includes traversing Summit Rd just after Mt Vernon at the Huntsbury Track intersection, but keeping on the MTB track for this beautiful section of flat running (the Bowenvale Traverse) through tussock to Victoria Park and onwards via Thomsons Track to traverse Dyers Pass Rd to The Kiwi where there are toilets, water and even a cafe (29kms).
From the Kiwi, take the Crater Rim track above, and initially left of, Summit Rd, follow signs to traverse Summit Road after 2kms, running on the right side for about 1km before again traversing the road to continue on the Crater Rim track on the left side of the Summit Rd after Worsleys Rd, all the way to the Sign of the Bellbird car park, complete with stunning views. From SOB car park, resist the temptation to follow the Summit Rd all the way to Gebbies Pass - instead follow the Crater Rim track walking signs to keep on the trail, including a very sweet section winding through native bush before being forced to join the tarmac. Descend to Gebbies Pass (42kms).
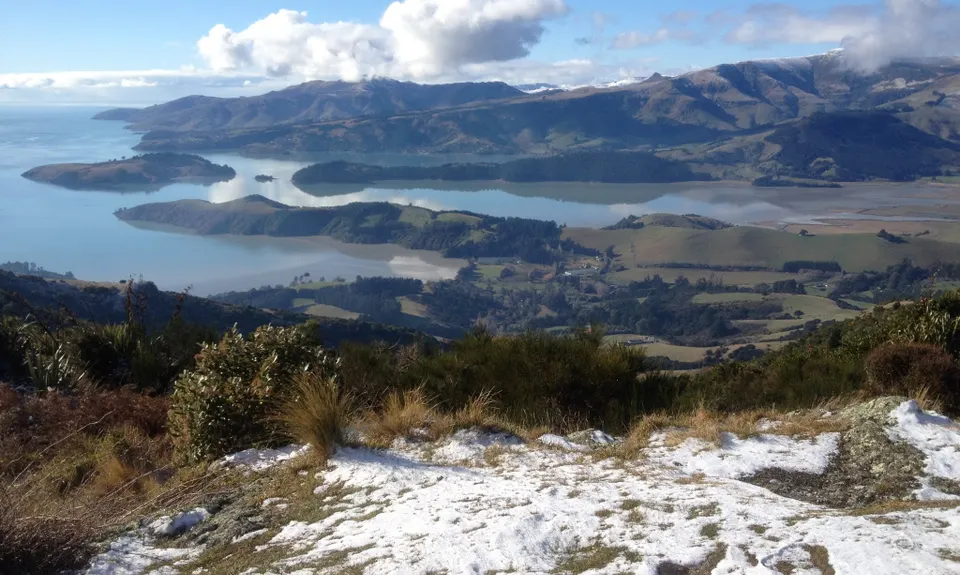
At the intersection of Summit Rd/Gebbies Pass turn left for just 100m before following a track on your right sign-posted for the Packhorse Hut. This section is subject to some change during felling but is well signed. Follow up through the forest and eventually traverse along to the Packhorse, looking across the harbour to where you came from earlier in the day. Water and toilets available at Packhorse Hut (47.5kms).
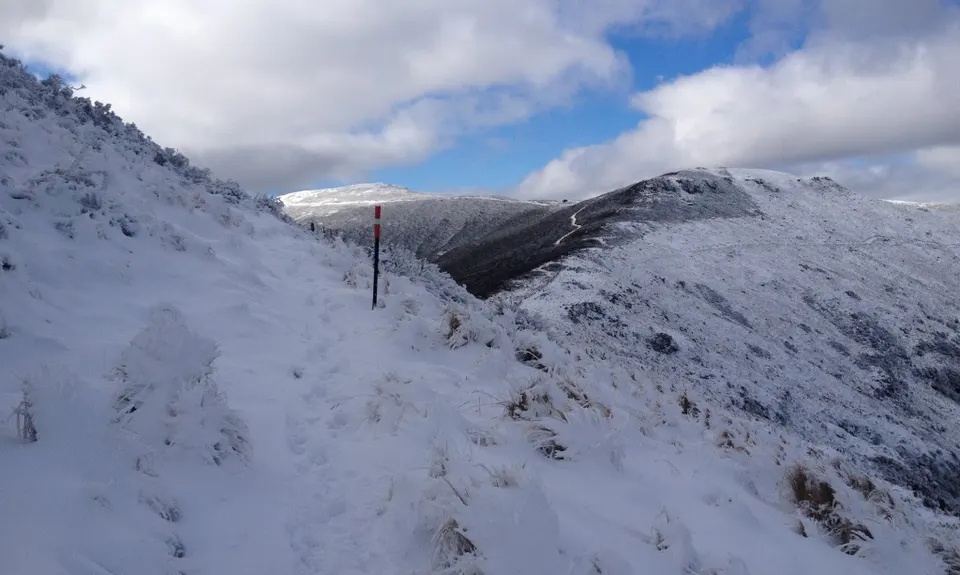
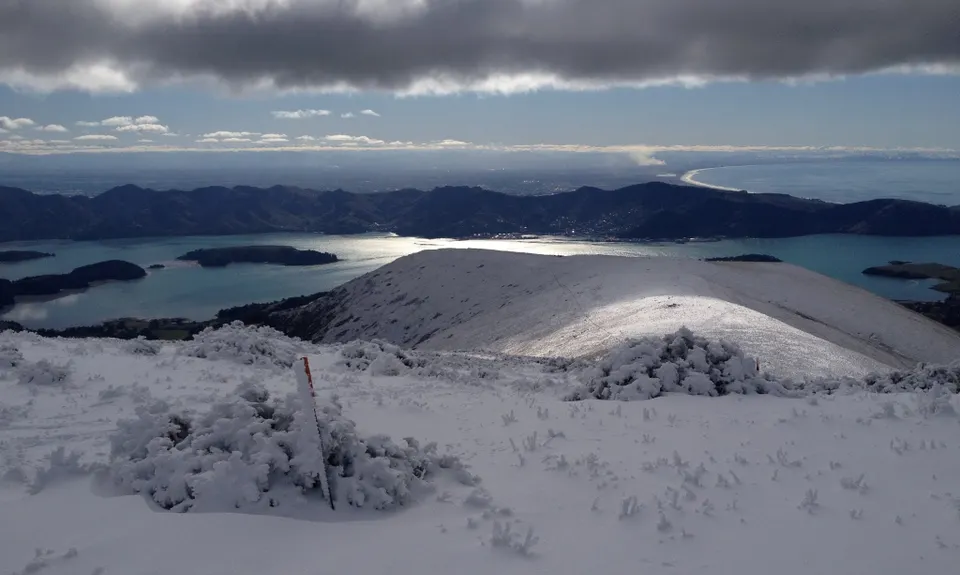
Now the tough bit (particularly in the snow!). Follow signs to Mt Herbert, first heading up gently from the Packhorse but then becoming very steep and zig-zagging before traversing round the hillside. Eventually merge with a more major track shortly before passing the Mt Herbert Shelter on your right. Continue along the gravel track (or snowscape) until you see a sign and trail on your right to Mt Herbert Summit. In around 500m you will hopefully be enjoying a truly stunning view, surveying the sky-line above the harbour from whence you set out this morning.
Eventually descend from the summit of Mt Herbert, heading north to follow the signed Mt Herbert Walkway all the way down to Diamond Harbour. When you reach the first sealed road (Marine Drive) cross over this and follow the trail down the hill to the rocky shore-line / beach. Find a trail on your right that will take you uphill briefly and then down to the Diamond Harbour Jetty.
NB The section from Packhorse to Gebbies: Unfortunately as at November 2019 logging operations have completely decimated the nice forest section in the middle. You are now diverted out onto a couple of km's of 4WD road and then link back up to the last bit of trail before the Dykes on a grotty but well marked section or logged area. Its all open, but can be expected to change again before operations finish, best check before you go with DOC.